Posts

Showing posts with the label illustrations

Leftovers: Anklets

Image
Even if it might still be cold...Let's leave the winter behind and start preparing and daydreaming about those lovely summer evenings en festivals... lets get in the summer mood! :D Even a tiny bit of leftover is enough to create a cute summer anklet:) There are many many many variations possible and many many many different leftovers to choose from. Today I'm just going to start by explaining a simple "ti at the end" ankle bracelet. p.s. See bottom for more inspiration and ingredients! 1. Start to finish:) Gather your pile of tiny leftovers and start making matches of colours and or fabrics/ strings. Use the longest string first and tie a loop at the end of it (to make it more sturdy you can fix it with needle and thread) Ad or braid another 1 or 2 cords (even if they are small you can place them just in the middle) Tie/fix the ends to the long cord and hide the knots bu placing caps (available at most bead/craft stores etc.) Done! Make some presents for...

Bring your old blouse into the 21st Century!

Image
This project is based on using a blouse you already have wasting in the back of your closet..if you don't know such a blouse and find nothing in the back of your closet you can of course buy one that would be just perfect for this project... Make sure to check variation tips on bottom of the page! I'm making two different blouses in three different steps. Decide what you want first and then use the most fitting explanation:) 1. Cut out the past Version 1 & 2 Take the old blouse and lay it on floor or table. Cut where needed and make sure to leave some trimming space (or add borders) and try to keep the existing trim line when possible! 2. Sewing it back to life Version1 Trim all the edges (also along both sides of our long strip unless you want to use a different fabric). Then attach the strip along each side of the neckline leaving enough length to make a bow. Version2 Tim all the edges and remove buttons from bottom part (if you want a small bow...

A girls real best friend...

Image
What's a girls best friend? Diamonds?  LBD Little Black Dress? NO! A real "girls best friend" is the EBB Elastic Black Belt! <3 The proof of this you will find on the " How to wear " page. And now we can make sure we have one for every occasion:) Start with an elastic black belt or peace of black elastic (with of 4/5 cm is recommended and maybe make one of 2/3 cm). We will need: - (If your starting from scratch: elastic (1m. eventually 60-65 cm with space for overlap/finish) and a closing clasp or push buttons) -  Black thread or strong glue. -  (Push buttons or Velcro  (2pc) if you want to cover the closing) -  Decorations (bought application, broach, button, peace of lace, black felted sheet, beads, cord, necklaces/chains, etc.) p.s. more variations/inspiration on the bottom of this post! 1. Think fast Decide if you want to cover the closing or if you want to have the closing in the back. Close front : In this case you can either pu...

Classy made Easy

Image
We can make so many different versions of this one! :) Right now I'm going to explain only my version but like always...feel free to totally make it your own! Use different materials for the thread, change classic charm for feather or a huge peace of jewellery, and close with whatever material you have or prefer. Plus experiment with different lengths and so forth and so on... ok, lets just start shall we? Needed: Any material for rope/thread, any type of charm, any type of closing material and some creativity. It's super easy and addictive! You can even make them while watching netflix;) 1. Find the middle Take your peace of... rope and make sure it is longer then needed! find the middle and make a knot above the middle, leaving a loop. (if you don't know how: hold the two sides together and make a knot) If you need/want a big loop then knot it even more up. 2. Tie the knot Keep making knots until you reach the perfect (decolleté) length is reached....

From scarf to magical beachdress!

Image
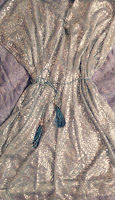
It's one of the easiest DIY projects whith amazing results! Don't be shy....just try!:)     Maybe you have some scarfs at home that you don't ware a lot, or you can go to the market and find the right size and pattern:) Either way, lets get started! 1.   FOLDING  Take a scarf that is broad enough to cover your width and fold the length double to see how long it is. If it's long enough you can use it! But not to worry if it's not long enough you can still make it into a caftan top!:) 2. CUTTING  Find the middle (where your neckline is going to be). Then make a tiny cut. Later decide the front and cut a v line as deep as you prefer:) Always best to start small and pay attention to cutting straight! This way you can keep trying it on and add more neckline when/where needed. 3. SEWING  Sew the neckline all around to hide the cut marks. And add any kind of hem you would prefer. (even jewelry! or another scarf! or lace!) Then put the ...