Party Proof Festival Looks!
Step by step I'm going to post tutorials on how to eventually create your total " Party Proof" Festval look!:) You should of course totally make it to fit your personal style, an just have a lot of fun with it! :D

Ok, Lets's start!
1. Elasctic " Party Proof" Accessories part I
 Everything is elastic so even with your wildest dance moves there is no danger of getting caught and hurting yourself️ Plus it's easy and comfortable to wear and on top of that.. Easy to make!!!
- 1. Match your outfit by using some of the fabric or lining (or something that matches) for an elastic bracelet. Make it a little bit longer then half your wrist and sew it (easy by hand) to some thin elastic. Done! Add a charm or some fringes or paillettes and you're totally matching your unique look.


- 2. With some thin elastic cord (find a good or bold colour to match or clash your outfit) and all you have to do is decide the length, tie some loops at the ends and hang any charm, stone, feather you like! You hang the necklace simply by putting it on and making a knot in front center leaving the ends hanging asymmetrical (for more details see1nici.blogspot.com/accessories)

- 3. Using the same elastic and method as the necklace we again hang something at two loose ends. You can either tie the bracelet around your arm or fixate it with a metal ring or metal cap(don't be afraid to mix silver and gold and different colors... This way it matches almost anything;)
Any questions? Feel free to ask! Enjoy the free tutorial and don't be shy to show your results! #1nicishowmeyours

And enjoy the festival season!!! 
2. Multi Usable " Party Proof" Festival Basic!

I could go on and on, but lets start making our own basic " party proof " skirtdress!

1. Choose a fabric for your perfect base (a bit elastic makes it more flowy and easy to work with but a cotton can be also used), then cut a 150 by 150cm square. Trim all the edges if/when needed. and keep in mind that part of the sides will aslo be showing in the split.
Now i have made some pleads before making the tunnel, but the effect was not super visable and to keep it easy lets just make an elastic tunnel! Fold the top over the elastic (depending on type you will need around 1 meter of elastic) and pin one end of the elastic to the end of top with a safetypin. Start sewing the tunnel (make sure you don't accidentally sew through the elastic!) and when the elastic is ending pull the elastic towards you (making ruffles at the beginning).


3. Now use leftover fabric to sew a long tunnel that you then pull inside-out and use as a belt. You can also use a thin stoke of left-over fabric (or something else) and braid it together with some other colors or (like me) silver and gold, so it would match almost anything:) At the end of the braids you make a knot and cut of the ends. Then you can even cover the knots with a jewelry cap and/or hang some charms or feathers or whatever you like at the ends! Now you are ready for tje rest:)
Feel more then free to share your results: #1nicishowmeyours And Enjoy getting ready for the Festival Season!!

3. " Party Proof" Accessories part 2
Never enough accessories;)

Starting with the feathered hair strings..
To firmly attach feathers to anything i would advice to use clasps (you fold the open edges over the end of the feather and close them extra firm with some thongs). If it's just for one evening you might also be able to knot and glue them to the string.

If you want, hang some charms or big beads at the end and when you're done just take the middle of the cord and push it inside a bobby-pin or hair clasp or even around an elastic or inside your own braid:) Done! Hope you will look and feel amazing!

On to the earrings!

Then you want to elongate the earring.. In this case i used multiple metallic clasps but I'm sure it would also look awesome if you hang a string of beads down from the earring and attach the feathers at the end. Or use invisible elastic for a flowy effect etc.etc. Whatever matches your outfit and ofcourse..YOUR style!:)
Lets make a second headpeace!
We will need a small comb or even a small tiara or even plastic kids tiara to start with.
You can then attach anything you like to it! For now, I'm gonna explain what i did to it...

Glue or stitch them together so they will stay in place. (you could also start by cutting a peace of felt to later attach to the tiara with everything already fixed on top.)
Then add some feathers, glitter, whatever you can think of that will just make your total look complete, to the front, sides and back of the flowers. (I stitched everything together but if you have a good glue it should be ok as well) Then i stitched the entire thing on to the (cheap kids) tiara e voila!
If you're going for a smaller peace you could also attach it to a hair pin or if you want to make a much bigger headpeace i would advice a big (deep/broad) headband and maybe some iron cords to maintain the peace standing up straight while dancing! ;)

And then for the Necklace
For general tips on how to make really simple necklaces take a look at https://1nici.blogspot.com/p/accessories.html I've made some illustrations and clear explanations to make some simple variations of necklaces!

Attach feather in the middle of the cord and make a knot above then make another knot about 2 cm above (to create an open circle and make the feather hang lower) do it once or even 5 times and in the end decide how low the neckline should be and tie a knot behind your neck. Easy right?! (If you dice not to use elastic anyway, make sure the neckline is low enough to put on and off over your head;) You can also use an elastic beaded necklace as a basic and attach some charms and feathers on there! :) Get creative, enjoy and make it totally YOU!


Enjoy getting ready! More to come....Let's make a complete Festival look!

4. Customized Denim Jacket
Basically go nuts! Use an ols one or buy a cheap or secondhand denim jacket and get creative:)

For example..i started with scraping the denim a bit (see more demolishion tips) and attaching multiple strokes and fabrics etc. to the back, the neckline and the ends of the sleeves.

5. Boho chique EASY Festival TOPS
 Puzzle time! You can make it as easy or difficult as you want and you can use any type of embroided or croche`ed elements! You can make a puzzle of different shapes and colors and stitch them all together or get a sheet of 1 type and simply cut out some peaces:)
Ready to start? Ok, let me explain what i did and then feel free to do it totally in your own style!
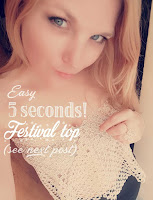 Easiest ever, 5 sec. Top!
Take a peace of fabric, lace, appliques of about 45 cm high and 120cm long. Wrap it around and either make a bow, stitch or pin the top part together (nice and tight) and simply let it flow! Done!
(boomerang on Instagram @1nici_diy)

Take a peace of fabric, lace, appliques of about 45 cm high and 120cm long. Wrap it around and either make a bow, stitch or pin the top part together (nice and tight) and simply let it flow! Done!
(boomerang on Instagram @1nici_diy)

I took a sheet of flowers, folded double (at top) and cut about 45 cm in height and width (if you have more width then i suggest to leave a bit more for the sides if you want the top to close). Then i simply cut out a v shape on both sides and voila! Done! Nor if you want the front to be more stable you might want to cut a smaller v in the back. And if you want the sides to close then fist decide if you want it to be still loose or more of a tight top.
For a loose top you can add extra peaces in the sides and stich the endings together. If you want it to be more tight fitting; Either stitch or tie elastics between the side endings or make a corset braid using one peace of elastic or cord!

Start the same as the easy top, only cut all trough the middle in the front and cut only a few for the neckline. You can add peaces in the sides, pin in the low middle of the back 2 or 3 peaces together so the vest moves more backwards or even add a belt/rope or some buttons to close in front. If you like to add some sleeves then check if you have enough leftovers and attach them in the end!

Keep the end shape in mind and start cutting strokes. Then place them together as a puzzle and stitch them where they connect. Or if you want to place for example a big red rose in the middle of black tiny flowers, put the shape on top and start cutting the shape out of the black flowers (so you see exactly where they might connect). Like i said; You can even use all different types of appliques (just takes a lot more stitching/connecting/puzzle time) and you can add things like sleeves and belts and buttons and ruffles etc. If you cannot stitch at all...you can even use see through elastic cord and make knots to connect peaces. Be creative! And most of all enjoy the puzzling!:D
Please share your results #1nicishowmeyours and feel free to ask anything if you're struggling with your puzzle !
Almost ready for the complete look!!!!


The complete 'Party Proof' festival looks!


Comments
Post a Comment
Feel free to comment or upload your unique version!:) ...